Packer: In 10 minutes, from zero to bootable VirtualBox Ubuntu 12.04
Packer: In 10 minutes, from zero to bootable VirtualBox Ubuntu 12.04
Trying to build a simple VirtualBox Ubuntu image was not without digging around, even though the documentation at Packer would lead you to believe everything is quite straightforward. If you were looking for a concrete example of creating a VirtualBox Ubuntu 12.04 LTS image with Packer, this should be a straightforward guide to get you up and running fast. (Updated for packer v0.10.1)
Packer is driven by template files, so the first thing we need to do is create a Packer template. These are JSON documents that let Packer know what you want built, how and other things that are outside the scope of this guide. There can be a few discrete sections in each template, but let’s focus on the most prominent one. Instantiating a “builder” (in our case a VirtualBox builder) to create a VirtualBox image.
Roughly speaking, the building process takes an ISO you have specified and uses it to create a full-blown installation of the OS. This is accomplished by mounting the ISO, booting off it, dealing with the OS installer initial UI, and proceeding with an unattended installation. If everything goes well, we then have a functional, bootable VM image.
The crucial parts here are two:
- Dealing with the Ubuntu installer initial UI.
- Completing a hands-off installation.
Both issues can be dealt with the boot_command option.
This is an array of commands that are sent to the graphical Ubuntu installer as if you were typing them at a physical keyboard. In our case, we need to bypass the graphical installer (by typing ESC ESC ENTER), drop to the boot prompt and then type some configuration directives there.
One of these commands will instruct the Ubuntu installer to fetch a preconfiguration file (preseed.cfg) from a local web server Packer has spun-up, that will automatically provide answers to the installer prompts, thus automating the installation in its entirety. You can find more information on preseeding here and here. Of course this file will have to be created and tailored to your needs, but you will find a fully working example further below.
Do note that due to missing CA certs, the preconfiguration file is best served from a non-https URL. Keep this in mind if you were thinking of not using the Packer web server and linking to, for instance, a GitHub repo.
Now, armed with this information, we start by creating the Packer template. Before anything else, create a folder inside the packer directory named ubuntu_64 to store the template and the Ubuntu preconfiguration file. This will also be the directory Packer will make available over http to the VM while it is created.
Let’s name the template ubuntu_64.json and place it in the folder you previously created. Take a look at mine:
Remember that you can always validate the correctness of the template by running packer validate ubuntu_64.json
Next up, preseed.cfg, the file used to preconfigure the installer:
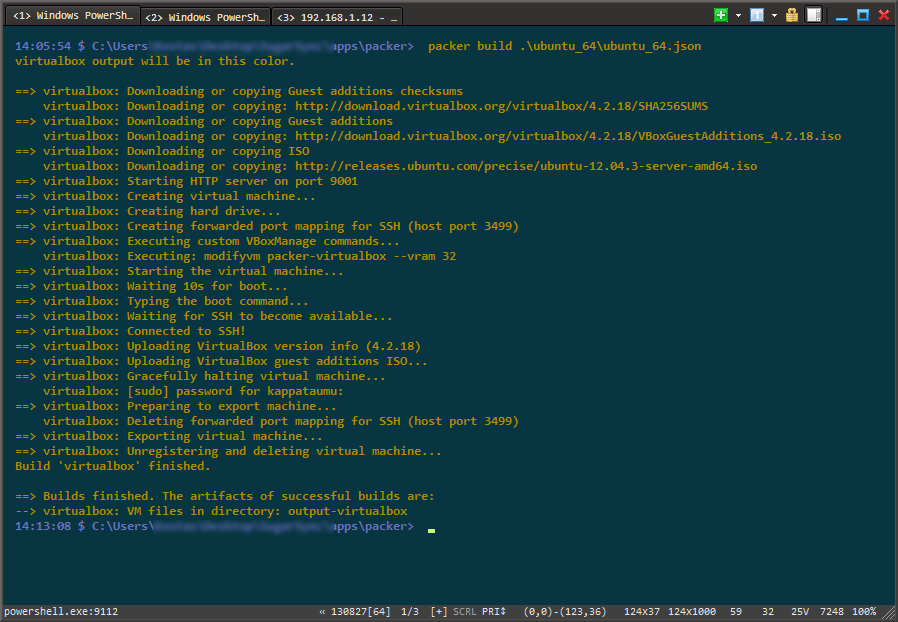
Now we can finally build the image:
So there you have it! Now we can login and play. Keep in mind that by default the host cannot communicate directly with the guest, because the guest sits in its own subnet, behind NAT. You need to modify the VM properties so that the active network adapter is bridged. Then the guest can get a DHCP lease from your network and be accessible from any other computer.
You can do this without leaving the shell by first getting a list of the available local interfaces suitable for bridging (here you can see mine) and then instructing VirtualBox to assign one to the VM that was just built (and imported!). What we need to note is the interface’s “Name”, which is what we’ll provide to vboxmanage:
$> vboxmanage list bridgedifs
Name:            Intel(R) Ethernet Connection I217-V
GUID:            //
DHCP:            Enabled
IPAddress:       192.168.1.12
NetworkMask:     255.255.255.0
IPV6Address:     //
IPV6NetworkMaskPrefixLength: 64
HardwareAddress: //
MediumType:      Ethernet
Status:          Up
VBoxNetworkName: HostInterfaceNetworking-Intel(R) Ethernet Connection I217-V

Name:            TeamViewer VPN Adapter
GUID:            //
DHCP:            Enabled
IPAddress:       169.254.84.20
NetworkMask:     15.0.0.0
IPV6Address:     //
IPV6NetworkMaskPrefixLength: 64
HardwareAddress: //
MediumType:      Ethernet
Status:          Down
VBoxNetworkName: HostInterfaceNetworking-TeamViewer VPN Adapter

$> vboxmanage modifyvm your-vm-name-here --nic1 bridged --bridgeadapter1 "Intel(R) Ethernet Connection I217-V"